

Anita White Came to Town
July 8-10, 2026


Anita White is a McGowen certified (2001) teacher from Overland Park, KS. She will work with you personally on any project of your choice. She loves plaids, textures and antique paisley. Anita prefers 6-9 cuts and will use smaller as the pattern benefits. She loves to share her knowledge and passion with her students!

Front row: Linda Cline, Anita White (Teacher), Deb Tomsheck
Back row: Norene McEowen, Norita Blue, Carol McMillen, Rita Frantz, Maggie Goetz, Win Grossman, Denise McCall, Linda Powell, Norma Preneta, Linda Hershey, Jacquie Lee, Valerie Ringel, Linda Cook and Katie Allman peeking around her shoulder :)


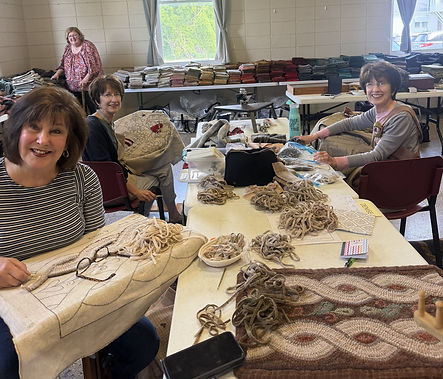
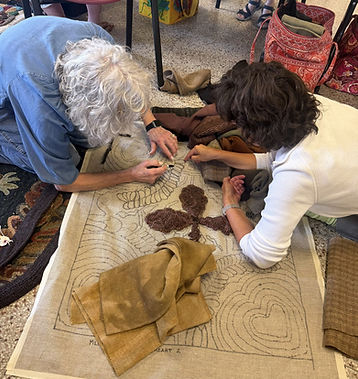
Sharing what the ladies learned from Anita's class


Rita wanted a little more varigation in her red border so Anita suggested to use a reddish-orange tint plaid wool to create highlights.
When you look at a color on its own (like the wool swatch), it might look like a soft "salmon-pink." But when you place that same swatch directly next to a deep red border, something magical happens:
-
The Red Pulls Out the Orange: The deep red border acts as a heavy visual anchor. Because it is so saturated, your eyes naturally look for the contrasting undertones in the plaid. The red elements in the border "absorb" the pinkish tones of the swatch, making the warm, bright orange highlights pop out much more intensely than they do on their own.

Deb said her experience in taking Anita's class was the sheer convenience of staying close to home and enjoying the camaraderie of hooking with friends.
Guild-hosted classes and workshops really do offer a fantastic, cost-effective alternative to traveling for rug schools or camps. Staying local not only saves money on lodging, food, and travel, but it also allows people to enjoy the hobby right alongside their local community and friends.
Learning a new finishing technique from a teacher like Anita is a huge plus, too. Finding the perfect way to finish or whip the edges of a hooked rug can completely transform the final piece, so it’s always exciting to bring a new method back to your own frame.

Linda Powell collected wools that she wanted to use for her piece based on her color plan and was surprised to find that she still needed other pieces (from Anita) to make the project come together.
Valerie later commented on the plaid piece of wool (pictured on the right) and how amazing a single multi-colored plaid can act like a "bridge" for an entire piece!
When you look at a palette of solid wools, they can sometimes feel a bit isolated from one another. But a plaid that contains hints of your primary colorscheme you are using elsewhere—suddenly marries those sections together perfectly.


Linda Cook decided to get a headstart on hooking the tail of her turkey before class even began only using solid colors. She didn't want to hook the body in a solid color, and asked Anita for her advice. Well Anita's advice highlights a fundamental rule of color planning: a good plaid bridges the gap between chaos and cohesion.
By hooking the turkey's tail in solid colors, Linda Cook established a bold, vibrant focal point. If she had hooked the body in another solid color, the turkey might have looked blocky or cartoonish. Instead, by introducing a plaid body that subtly echoes the exact hues of the tail, the entire bird comes to life. The plaid gives the body texture and depth—mimicking the natural layers of feathers—while pulling the entire color palette together so the tail doesn't feel detached.
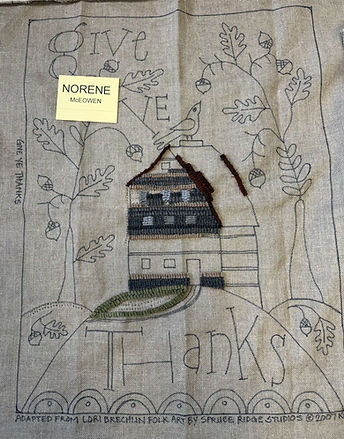


Katie noted Anita had lovely dyed wools that everyone enjoyed and applauded Anita's hands-on assistance with color planning. It was incredibly helpful to everyone in the class, making her a highly enjoyable teacher to work with.
Katie’s praise really highlights how Anita checked every single box for an incredible instructor: she brought the expertise, the generous gifts, the stellar color guidance, her trunkful of paisley, and a powerhouse inventory of dyed wools and unique fibers to inspire everyone. The paisley delighted our patterns with a special spark of interest!


Both Linda Hershey and Win wanted to learn how to hook a glass jar of flowers in water.
Hooking glass and water is easily one of the ultimate tests in rug hooking. It requires capturing the optical illusion of light bending (refraction) and the subtle, distorted shifts where the flower stems hit the water line.
Linda's rug celebrates America's 250th birthday. Anita instructed her to add some specks of the background wool in the bottom of the jar to make it look like you could see the background through the water.
Win's rug went in another direction. Win did her own color planning and wanted to incorportate a "Beauty Line" within her piece. A "Beauty Line" acts as a visual framing device, intentionally breaking up the transition from the busy center scene to the outer border.
Win stated, "You need to think out of the box sometimes" and it's evident by using a multi-colored striped wool that mimics the colors in the rest of the design. Check out how this piece of wool changed it's appearance after she hooked the beauty line.


When striped wool is cut into narrow strips and hooked sequentially, the colors morph. Instead of looking like flat, rigid lines, the colors start to "dance" and blend into a beautiful, variegated mosaic. It completely alters how the fabric looks on the bolt versus how it behaves in the hooked rug.
Both of their pieces are absolute triumphs of color planning and technique!
Tackling Checker Board Patterns

Pineapples are iconic in traditional rug hooking, but hooking them in a single, solid color can leave them looking flat. By switching to a variation of different gold woolens for every other square, Linda Cline used spot-dyed or textured wools to create depth. This variation creates "movement" across the checkerboard pattern.
Calculating background wool is notoriously tricky, but Linda used a brilliant, hands-on geometry trick to figure it out.
The standard rule of thumb in rug hooking is the 3-to-1 rule: you need roughly 3 square feet of un-cut wool fabric for every 1 square foot of hooked backing.
By folding her large piece of wool 6 times, Linda was using a visual math shortcut. Here is why that specific number of folds is so clever:
-
1 fold = 2 layers
-
2 folds = 4 layers
-
3 folds = 8 layers
-
4 folds = 16 layers
-
5 folds = 32 layers
-
6 folds = 64 layers
By folding the wool down 6 times, she compressed a massive amount of surface area into a small, manageable square. Laying those thick, folded squares across her runner allowed her to quickly estimate if the total volume of fabric would equal the 3-to-1 ratio needed to densely fill that background.
The Symmetry Secret: Tearing in Half
For a long runner with a mirrored design, Linda's final tip is a lifesaver. If you hook the first half of a symmetrical rug using up all of your favorite pieces of a specific dyed wool, the second half will look completely mismatched because no two dye lots or textured wools are identical.
The Golden Rule for Mirrored Rugs: Tear every piece of wool exactly in half before you start. Put one half in a "Side A" bag and the other half in a "Side B" bag.
This guarantees that both ends of her beautiful runner will have the exact same color balance, value distribution, and texture!

Maggie found Anita very helpful with color planning her rug. She learned several new ways to finish a rug resulting from her demonstration of the various ways to finish a rug. She thoroughly enjoyed the class due to its relaxed atmosphere and friendliness of everyone.
Hooking with Paisley Patterns

Paisley designs are famous for their beautiful, tight curves and elegant teardrop shapes. However, hooking those sharp, sweeping loops can put a lot of stress on the wool strips.
If you don't support them, the loops can lean, flatten out, or even fray over time from the tension of the surrounding rows. By hooking a stabilizing row of wool directly on each side of the paisley loops, Valerie essentially created a structural track. This anchors the loops perfectly upright, preserves the crispness of the paisley shape, and protects the fabric from wearing down.

The Power of Value Contrast
Originally, Valerie wanted to use a dark brown wool around her flower, but it is a common trap to choose a background color simply because we like it, without realizing how it will interact with the foreground elements.
Dark Brown would swallow the flower stems and petals. Without contrast, the dark values would bleed together, making the flower look flat and 2D.
By changing to a new lighter, textured wool value creates an immediate visual separation, pushing the flower forward and accentuating its silhouette.
Come on Baby, Let's Do the Twist

Big Title
The "twist" (often called a rope twist or cable border) is one of the most elegant geometric designs to hook, but it is entirely dependent on shading to make it look three-dimensional.
Jacquie used two darker colors for the outline, which is essentially hooking the "shadows" where the strands of the rope overlap and tuck under one another.
Adding four lighter shades of a collaborating color for the body of the twist is where the magic happens. By grading those four shades from dark to light, she creates a highlight right on the crown of each strand. This gradient tricks the eye into seeing depth, making the rope look like it is physically twisting and lifting right off the backing. It adds incredible movement to a border! Jacquie’s formula for this is absolutely spot-on.
Another item Jacquie found interesting was how Anita finished her rugs using a wrapped wool edge. This type of finished border gives a rug a seamless and antiqued finish.
Using wide strips of wool to wrap and hand-stitch the edge offers a couple of major advantages:
-
Visual Continuity: The frame of the rug matches the soft, rich texture of the hooked interior perfectly, rather than being framed by a stiff cotton tape.
-
Durability: Heavy wool fabric is incredibly resilient. Hand-stitching it tightly over the raw edges of the linen or monk's cloth backing protects the foundation from fraying while allowing the rug to lay perfectly flat.


It is always so fascinating to see how the exact same pattern can take on completely different personalities depending on who is behind the hook! By playing to their personal styles, Jacquie, Carol and Denise really highlighted the versatility of the "Twist" design.
-
Carol’s Americana Twist: Staying true to her love for primitive hooking and Americana style, Carol chose beautiful stars as the focal point for her piece.
-
Denise’s Custom Creation: Denise took the pattern in a different direction, playing with unique motifs and a distinct color scheme to make the design entirely her own.

Norita Blue originally wanted to hook a light to medium brown wool for her background, but Anita suggested to use a lighter value.
Background choices can completely make or break a rug, and discovering that a lighter blend of tans makes her motif pop is a game-changer. It is so easy to fall back on a solid brown, but adding that lighter value and texturing it with a blend gives the whole piece life and dimension.
Norita also wanted to give a huge shout-out to Anita for her generosity. Anita gifted every single attendee a loop lifter to help them keep their loops at a perfectly equal height throughout the project.


On behalf of the entire guild, we want to extend our deepest gratitude to Anita White for giving us her precious time, experience, and knowledge.
From her generous gift of loop lifters and her magical "trunkful of paisley," to her expert eye for color value and finishing techniques, Anita truly inspired every single person in attendance. She didn't just teach a class—she nurtured our creativity, brought us closer together as a community, and left us with skills (and wool!) that we will cherish for years to come.
Thank you, Anita, for making this workshop an unforgettable experience!